The Main Attraction Part 2
BRONCO MODELS.
Product Id :CB35104
| Size :1/35 |
Released Date:29/07/13.
|
As I said earlier I had already started the Uboat before I had thought about doing this blog, So I will just post up some pictures of the model. Sub has still to have some final touches done and to be painted.

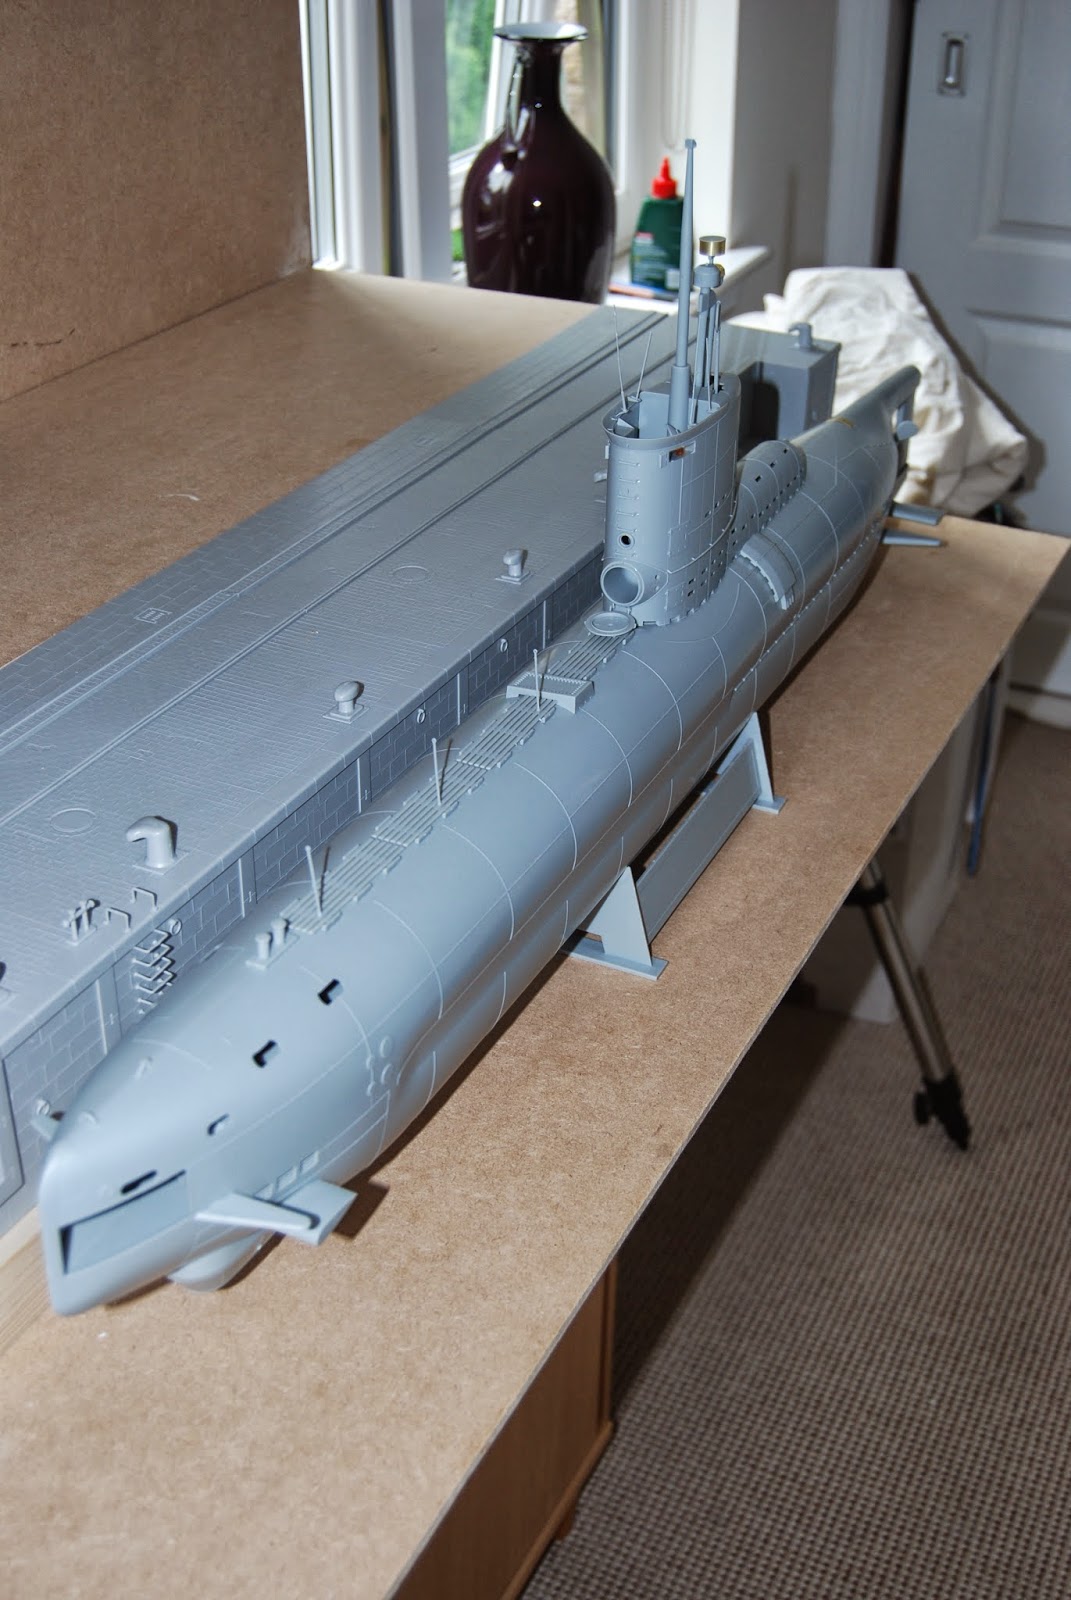
Here is the sub sitting on plinth alongside dock.
I have left the bow torpedo doors off of model as I am going to make a feature here. This will feature in a later post.

Here, a shot looking down at Conning Tower, this was the most difficult part of the kit to make-up. I found it hard to get all parts to fit together and glue. A little bit of time with this part is required and constant checking of all parts whilst glue takes hold.
Here is the sub sitting on plinth alongside dock.
 |
I have left the bow torpedo doors off of model as I am going to make a feature here. This will feature in a later post.

Here, a shot looking down at Conning Tower, this was the most difficult part of the kit to make-up. I found it hard to get all parts to fit together and glue. A little bit of time with this part is required and constant checking of all parts whilst glue takes hold.
Step 1/2: Your 1st job in building the Bronco kit is to make up the 2 torpedo's, these are very straight forward and do not take to much time. The difficult part is adding the VERY small etched brass propeller blades. Again I have made these torpedo's up but have not fitted them to model. I will use these on the dockside.
Step 3: Sees you starting with the 2 rear after sections of the submarine including rudder and propeller. Considering the size of the two halves they fit together perfectly with nothing more than cleaning up the mould marks, with the large section of part needing glued you will have to keep a wee eye on the seams when gluing. Not too much of a problem with these parts.
Step 4: You are now going to build the Bow/Stern planes and Torpedo doors,
Step 5: Has got you placing torpedo tubes into the front 2 sections of the u-Boat, again care needs to be exercised when gluing the 2 halves of the sub together, but again the parts fit together with very little effort.
Step 6: Sorry, I am not an expert when it comes to some bit of the subs. This stage you are fitting what I would call "Duckboards" it looks like slotted boards for walking along the deck, some vents and stanchions for the handrails.
Step 7: Here you have the scary bit.......joining the 2 halves together and at this point you get to see for the first time how big the model is. They fit together like a good pair of gloves. A firm push and the click together. Adding the bow planes and step 7 is complete.
Step 8: Is fitting the hatch and what I think is something to do with blowing tanks. Not a lot to do in this step.
Step 9: Is fitting the navigational lights and some other glass fittings to both halves of the Conning tower. There was an amendment to my instructions here it was to do with the colour of the lights, this my be corrected in future instructions.
Step 10. Details for the periscope and sub flooring inside the conning tower. A couple of wee fiddly bits on this step, the handle for the periscope are individual fittings.
Step 11: Is fitting all the parts together that form the conning tower together, lots of wee fiddly bits here so a little bit of care and attention with this stage
Step 12: Now you are fitting the completed Conning tower the the hull of the U -Boat and also fitting some of the etched brass parts
Step 13: Is making up of the plinth for the completed U-Boat to sit on.
Step 14: Is to string up handrail, I have not done this step as yet as I was going to spray model before fitting string
Step 15: and last step is to make up the lifeboat, this is a bonus part of the kit.
The kit comes with 5 options to the model,
U2322 U2329 U2336 U2326 U2360
Overall with the kit I was delighted with both the quality of the plastic and the way the kit all fitted together with very little work needed. I can remember doing models when I was a lot younger and spending loads of time trying very hard and using lots of milliput and sanding paper to get models to join together.
I will put up another post when I come to paint model.
If there is anyone reading this blog and would like more information or would like to see more photographs please do get in touch and I will try my very best to help you out.
Alan
18th October 2013
No comments:
Post a Comment